
Homemade Belgian Candi Sugar
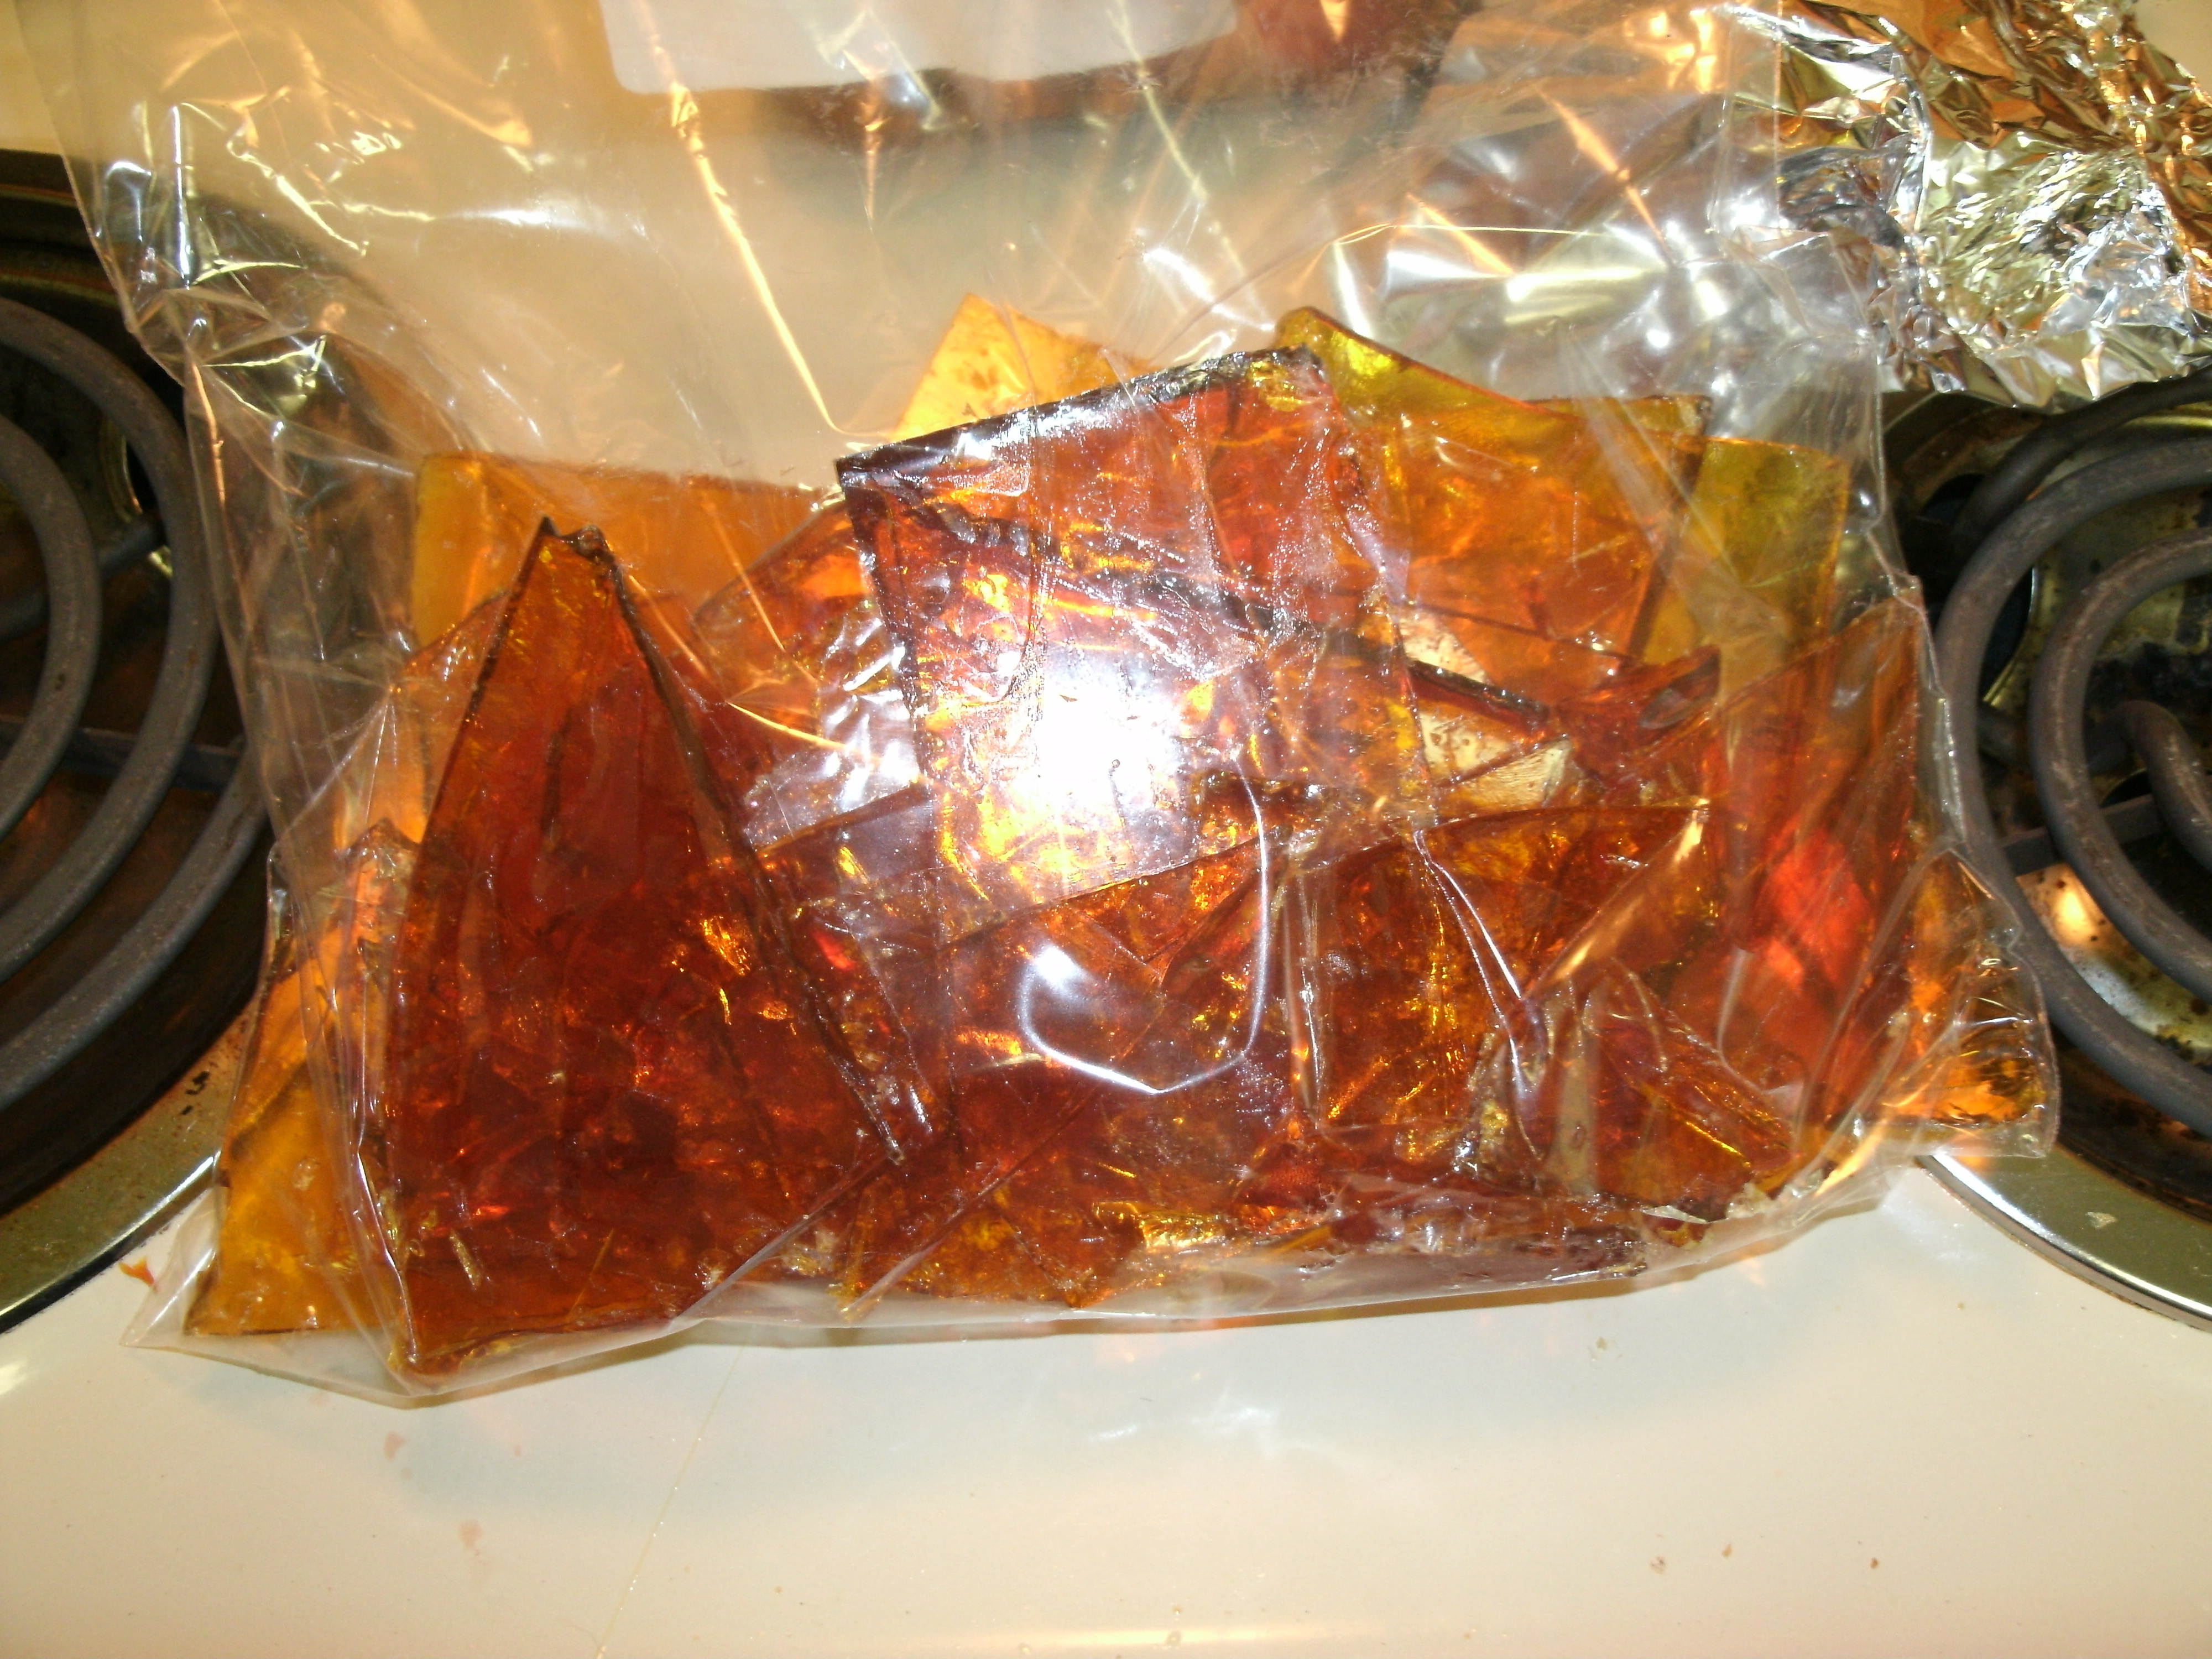 In creating my recent Belgian Dubbel (recipe here), I decided that I wanted to make my own candi sugar for the brew. After some quick Googling, I was able to piece together a fairly simple process that seemed like it would get the job done. Using this process the candi came out as well as I could have hoped, pretty much exactly like an unflavored Jolly Rancher. As for the beer, though the final gravity came in low (meaning a drier beer) it’s tasting good and headed into the cold crash stage, about to be bottled with more candi sugar this weekend. I put together this step by step photo tutorial mainly so I’d remember how I did it, but also so anyone can make their own candi sugar to brew with.
What you’ll need:
– Sugar and water, in a ratio of 1/2 cup of water for every pound of sugar. Use the same amount of sugar as Belgian candi sugar you want to end up with.
– A food acid, like Cream of Tartar.
– A candy thermometer. Lucky for me, when I was starting to brew I bought one by mistake to watch mash temps – unfortunately it didn’t go low enough to watch the chill temp, but I hung on to it anyway.
– A pot for boiling and a cookie sheet lined with aluminum foil for cooling.


6 comments on “Homemade Belgian Candi Sugar”
Leave a comment
Creative Commons
This work is licensed under a Creative Commons Attribution-NonCommercial-ShareAlike 3.0 Unported License.

Looks good, and fairly easy to make. Thanks for sharing, and let us know how the beer comes out!
Tasting the final gravity sample, it’s pretty damn good! I’ll be sure to post a full review of it once it’s bottled and carbed.
I don’t think Invert Sugar and Belgian Candi Sugar are quite the same thing – I noticed on the Northern Brewer priming calc that they list very different values for each. The invert one matches the dextrose, but the belgian candi syrup is much higher – maybe due to the sugars used?
Yea, this came up over on the Reddit post on /r/homebrewing yesterday, the invert sugar vs. candi sugar confusion. It seems that this is pretty much what is sold in stores here as Belgian candi sugar rocks. Apparently true candi sugar comes from beets. We could even add some yeast nutrient to this mixture above to give this mixture more complex flavors as well. But general consensus seems to be that doing this for added color and a boost to ABV will replace what you buy in stores that’s sold as candi sugar. For bottling, I’m splitting the difference between the amounts listed for invert sugar and candi sugar, and hoping for no bottle bombs.
Pingback: Homebrew Review: Catching Up | Das Ale Haus
Great reading your bloog